
Hi there folks...
Im back to share with you another box card that I made :) I actually planned to do this box card later of the month but Thanks to Sue Darcy - our friend at Stamp Junkies group over Facebook asked how to so I decided to do it abit earlier... Here it is ...

I'll share more later on how I did the box but now let's look at all around.
Here is how it look when all closed.

Here is from the side view

Here is another side view

Yes... I made it see thru box again and I had a blast making it :)
Here is how I started

This is what I need to start the box card. I used Box Card dies from Craftin Desert Divas to cut 2 pieces box panels out of kraft card stock and 2-3 pieces of the insert or depend on how many insert slot you want to make inside your box card. Generally I used 2. I recommend to used strong adhesive and I personally used Scor Tape 1/4"

This is the same as above but just becaused I wanted to do see thru box so I used the small rectangle die from the Box dies to cut my windows. This rectangle die is used to cut the layering paper to decorate the box panels.

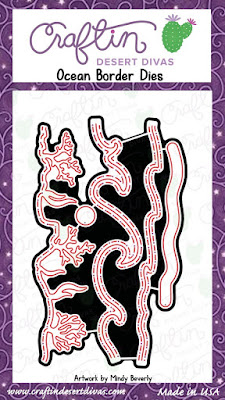
From there my based box card was ready and I moved on the the elements to design my box card. I used the Ocean Border dies which come with that amazing corals border dies, big waves as well as small waves. I also used the same rectangle die and square decorative dies to cut my panels. For the rectangle ones I wanted to be inside the box and the square one I wanted to decorative the flaps. I also stamped the sweet dreaming mermaid from Mermaid Lagoon stamp as well as the Dolphin and Octopus from Ocean Friends stamp. Both stamps are also from Craftin Desert Divas.
Since it's the see thru box card, I also stamped and heat embossed it on heat resistant acetate. If you only do the box card. You skip this window portion and under the sea scene.
I colored all images with copic markers except the sand area I used walnut stain distress ink and the blue/green background panels and the waves I used cracked pistachio and broken china distress oxide inks
That's for now I knew I would added some more elements as and when I progressed along to made it.

Oh one more thing, I decided to change my slot insert from normal kraft to acetate as well because it's see thru.
As above photo, I attached both box pieces together when it's laid flat and I also attached the background panel as well as the slots on top but just a hair lower than the scored lines.
Do not closed the box now because it will be much easiler to decorate the inside panel before forming a box.
As above photo, I attached both box pieces together when it's laid flat and I also attached the background panel as well as the slots on top but just a hair lower than the scored lines.
Do not closed the box now because it will be much easiler to decorate the inside panel before forming a box.

Here is how I decorate my inside scene. I did popped some of the elements up with the form tapes for dimensions. I added in the hermit crabs (big and small) as well as the shell.

Here is how it look after I closed. Tips : you need to fold the scored line for easy folding and forming the box shape especially that center fold. This is becaused I cut the window panels for both sides and that left little space for the paper to bend when folded. I also cut the tabs panels smaller than the original tabs just because I don't want the tabs to show at my clear windows. Hope that make senses.

This is how it looked after the box was formed and I decorated the panel with the pattern papers. Time to decorate the top scene. I used small wave as if the wave is smaller when closer to us and also for my dreaming mermaid to stand on. I used the big waves for the 2nd slot for my pink dolphin to jump over the waves.
Here is the top view before decorating the flaps.

Here is after I colored more of the elements and attached them all to the flaps. I cut a few more pieces of the Coral Border dies and colored them with copic markers. I also stamped the Oyster, Turtles and Fishes from Ocean Friends stamp and colored them with copic markers then fussy cut them out.

And here is the under the ocean view


I hope you like it. I have a little surprize Giveaway coming up on my IG account (@handcrafthobby) in next few days so stay tune and I hope to see you playing along. Thank you for stopping by today.
Hugs
Jan
(Links are affiliate links which mean I'll earn some money from CDD at NO EXTRA cost to you if you purchase from these links.... Thank you)
Here are products that I used
 | |
| Mermaid Lagoon |
 | |
| Ocean Friends |
 |
| Box Card |
 | |
| Ocean Border |
 | |
| Scene Builder |
 | |
| broken china |
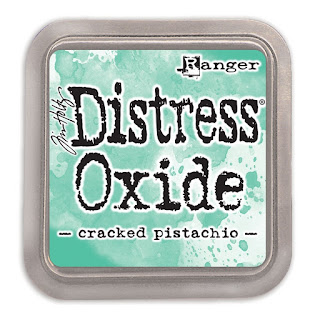 | |
| cracked pistachio |
 |
| Crushed Grape |
 |
| Scor Tape 1/4" |
 | |
| Glossy Accent |
 | |
| Mono Sand Eraser |
Wow this looks so amazing with all these wonderful details.♥
ReplyDeleteHugs
Angela
Thankyou dearly Angela for giving me some love and stopping by >hugs</Jan
DeleteHi Jan, thank you sooooooo much for the tutorial on how you made this absolutely Fabulous card, it's amazing!!! Will be checking out the dies, etc that you used, when pennies allow, lol. Hopefully I will then be able to have a go at producing something this spectacular. Very much appreciated. Huge hugs
ReplyDeleteThank you Sou! You don't have to buy just because I used them my friend... use or impliment on what you have and that's the beauty of crafting.. Those dies are just to make my life easier *lol* and I personally love CDD stuffs... Thanks again for stopping by and do share with us at the junkies group if you made one(s) >hugs< Jan
DeleteIts gorgeous!
ReplyDeletelove it!
Thank you so much Fiki for stopping by. >hugs< Jan
Delete