Thursday, August 23, 2018

You Whaled It! Obsessed With Distress Oxides Creative Challenge


Hello there crafty friends.... And Welcome to Craftin Desert Divas Creative Challenge : Obsessed With Distress Oxides.

http://www.craftindesertdivasblog.com/2018/08/learn-how-to-use-distress-oxides-inks.html

This week long we're playing around with distress oxides inks.  I was inspired by Sandy Allnock recent YouTube vdo about underwater scene with Alcohol Ink Refill.  So I thought that it will work as well with Distress Oxides inks.


I began by wetting the whole panel of watercolor paper and dropped the distress oxide inks in random areas.  I used shaded lilac, cracked pistachio and broken china.  With the help of paint brush I dropped more water in concentrated color areas, taped the panel against my working surface and let it dip downward.

Tips :  Do one color at a time and let it dried in between.


I tried to imitate the coral leaves by created the puddle of colored water and blow it upward with my month or you can use straw to create the random spikes.

Tips : If you choose the colors that compliment each others (opposite in color wheel like purple and yellow) you need to dry each layer of color before you add the new color otherwise it will mixed together and turned brown.


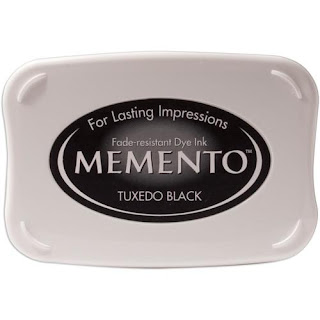
While waiting for my background panel to dry, I stamped the adorable whales from  Ocean Friends stamp and colored them with copic markers and fussy cut them out.


Once it dried I cut my main panel with Torn Paper dies and stamped the sentiment as well as the whales image directly onto my panel to get the whales' spouts and accent them with Nuvo Crystal Drops Caribbean Ocean.

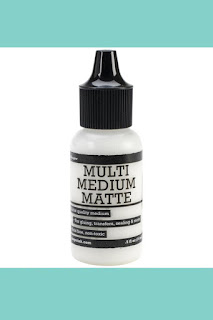
 I then attached the colored image onto the panel with Multi Medium Matte and the whole panel onto black card stock.  I also accent the edges with white gel pen.


I hope you like it and have fun with this technique.  Thank you for stopping by.

Hugs,
Jan


(Links below are affiliate links which mean I'll earn some extra from CDD at NO EXTRA cost to you if you purchase CDD products from these links.... Thank you for your support)

Here are CDD products that I used in this card
http://craftindesertdivas.com/ocean-friends/?aff=7

http://craftindesertdivas.com/torn-paper-dies/?aff=7


http://craftindesertdivas.com/nuvo-crystal-drops-caribbean-ocean/?aff=7

http://craftindesertdivas.com/white-gelly-roll-medium-point-pen/?aff=7

http://craftindesertdivas.com/multi-medium-matte-5oz/?aff=7


Saturday, August 18, 2018

Craftin Desert Divas August Release Blog Hop Day 2

http://www.craftindesertdivasblog.com/2018/08/august-release-blog-hop-day-2.html

Hello everyone!...  
Welcome to Craftin Desert Divas Blog Hop Day 2.   So glad you're hopping along with us.  I'd like to take this opportunity to share with you how I created my card combining both Hill Scene 1 and 2 stencils as well as Critter Punnies stamp to create this scene. 


I began by masking the carrot image and stamped repeatedly to created the big pile of carrots as well as the bunny from Critter Punnies stamp with Memento Tuxedo Black ink.  I then colored the image with copic markers and fussy cut it out.


With some masking, I used Hill Scene 1 stencil to create the tree with Distress Oxide Ink in Vintage photo.


Next, I used Hill Scene 1 and 2 stencils on top of each other to get the hill slope and the path but later on I change my mind and create the rainbow instead.


I continued with my original plan to create the path using some distress inks and distress oxide ink for the pebble area with Hill Scene 2 stencil


I also used the puffy clouds edges from Hill Scene 2 stencil to create the sky.


Here is how it look before I changed my plan.  I feel funny that the path is way up to the sky *lol*  So I decided to trace the path stencil from Hill Scene 1 stencil and divided the areas for the rainbow colors.


I feel like it more and it makes sense to me.

Here is the closer look one more time 


I also stamped the pun sentiment onto white card stock and cut it with the label die from Tag It dies.

And here are 2 more cards that I showcased in the release.


For this card, I played around with the Mushroom Border dies by continuing cutting the die to make it longer and I moved the tree stump which originally will be toward the left side.  I just wanted my sweet squirrel to have something to lean on... *lol*   I used the Torn Paper dies for decorative edges and accent faux stitching with white gel pen.


As for the sky I used Hill Scene 2 stencil for light yellow clouds background and finished it off with Lollipop sequins.


As for this card, I love the new Inside Scalloped Oval dies to frame my scene.  With Harvest Border dies, I created the hill background for the adorable troll and her scarecrow.  And again I used Hill Scene 2 stencil to create the path as well as the puffy clouds sky.


I also used Flag Banner dies for my sentiment and here is the closer look.  I hope you have fun hopping along with us today.

Once you're done hopping, head over to the Craftin Desert Divas shop to snag you special discount 5% off through 8/19. Including new release products.

http://craftindesertdivas.com/new-release/?aff=7

I said too much already :) So please hop along to our next Guest Designer Angelica

Thank you
Jan
And here is the lineup for today Blog Hop Day 2

Jan <--- You are here
Angelica (Guest Designer) <--- Your Next stop
Elaine  


Thursday, August 9, 2018

Does This TuTu make My Butt Look Big? Smiles Across The Miles Creative Challenge


Hello everyone... 

Checking in today a super easy clean and simple card for Craftin Desert Divas Smiles Across The Miles Creative Challenge.

http://www.craftindesertdivasblog.com/2018/08/smiles-across-miles-best-tips-encouraging-cards.html


I love to send handmade cards because they're labor of love and care... They're perfectly imperfect and not like machine made. I often did a set of handmade cards for ones that I love to send to their love ones and spread the kindness and bring someone smiles on their faces.  I treasure all handmade cards I received and I've special box for housing them. Like I said they're labor of love 


 I have soft spot for pig...LOL  and I think this adorable little piggie from Twinkle Toes is just so darling and together with the sentiment it makes me smiles and I hope you are too.

I began by cutting my main panel with Inside Scalloped Rectangle dies and worked on the inner panel by stamping the image toward to center top with Memento Tuxedo Black ink.


I colored her with copic markers.
Skin : R00 R02
Outfits : BG11 BG13 BG18


Inside Scalloped Rectangle dies also have this small bow die as you seen on my card.  I cut it on vellum and colored behind the vellum with BG18.  I also cut thin strip of vellum and wrapped around the inner part of the card front.

To finish it up, I sprinkle Lollipop Sequins here and there.  And it's done.


I hope this card can bring you a smile and Thank you for stopping by today.

Hugs
Jan

(Links below are affiliate links which mean I'll earn some extra from CDD at NO EXTRA cost to you if you purchase CDD products from these links.... Thank you for your support)

Here are CDD products that I used in this card

http://craftindesertdivas.com/twinkle-toes/?aff=7


http://craftindesertdivas.com/inside-scalloped-rectangle-dies/?aff=7

http://craftindesertdivas.com/memento-dye-ink-pad-tuxedo-black/?aff=7

http://craftindesertdivas.com/lollipop-sequins/?aff=7