Wednesday, October 11, 2017

Angel Kisses and Christmas Wishes stamps

Hello everyone... 

 Im so happy to be on Craftin Desert Divas' Blog today showcasing our Day 3 October Release.   We have 2 new stamps Angel Kisses and Christmas Wishes.  They're Gorgeous!

October Release special: Save 10% on your order using code: release. Offer is valid 10/13 thur 10/16, instock items only, not valid for wholesale orders or previous orders.


Here is what I have for you.
Project #1 featuring Angel Kisses stamp.


Isn't she beautiful...  I also can't stop using the gorgeous Snowflake Flurries.  
Here is how I made it.


I created a diamond mask out of thin typing paper as well as the little angel.  I also stamped her with the sentiment at the bottom onto white cardstock and cut it with Inside Scalloped Rectangle dies.  


I used the positive mask to cover the top part of the image and began to use VersaMark on the stencil and heat embossed the panel with Frosted Cystal embossing powder or you can also used clear or white embossing powers.  I then ink blended with pink distress ink.
I then put the negative diamond mask and also ink blended the inside diamond shape with some light/dark blue distress inks as well.

Here is the closer look.


I colored all the images with copic markers and put Glossy Accent on her wings and the golden ring above her. I finished it off by dropping Nuvo Crystal Drops in Morning Dew and stars with white gel pen.

Project # 2 : Christmas Wishes stamp


I love the snow globe from Shake It Up dies  I also included in Fall Border dies from previous release to set my snow globe scene.

Here is how I did it.


I created the circle from Shake It Up dies with watercolor paper and used blue shade distress inks to make night sky.  I stamped and colored the sweet girl flying with the reindeer with copic markers and fussy cut her out.

From black card stock I cut the border die and selective area I cut it with the same circle dies.  I also used Flag Banner dies for the sentiment.  

I assembled the snow globe for shaker and filled in with Flower Soft in Polar White.  For main background I used Snowflake Flurries stencil on kraft card stock with watermark ink for soft look.


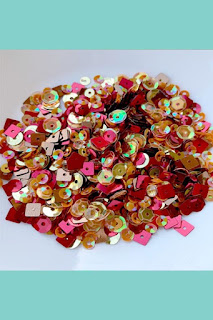
I also cut the main background panel with Crazy Stitched Frame dies and sprinkle our new sequin Jingle Berries here and there.

I hope you like them and Thank you for stopping by today.

Hugs,
Jan
(Links are affiliate links which mean I'll earn some extra from CDD at NO EXTRA cost to you if you purchase CDD products from these links.... Thank you for you support)

Here are other CDD products that I used

Crazy Stitched Frame
Inside Scalloped Rectangle 
Shake It Up
Flag Banner 
Fall Border
Morning Dew
Glossy Accent

White Gel Pen


Sunday, October 1, 2017

Truly Greatful - Top 3 Favorite Color Combos

Hello everyone!
So glad to be back on Craftin Desert Divas' Blog today.

We are jazz thing up a little bit for Diva's blog posts to bring you more variety styles and topics for our blog readers.

From October onward, every week we'll share with you our projects and concentrate on the topic of each week.  For 1st week of October we're focusing :

"Top 3 Favoirte Marker Color Combos"
Here are my most used color combos


Blue : B24 B26 B28 This combo I normally used for any general blue object but if I color Sea I'll use B000 B00 B02 B05
Green : I love to color flowers and there are so many colors of leaves but these are my favorite combos YG21 YG23 YG17 and YG95 YG97 YG99
Brown : For Hair I love to used E42 E44 E47 and hairs that tugged behind I'll add E49.  For animal I find E31 E33 E35 are beautifully and easily blended.

These are in natural blending group for copic markers.  I normally don't go with fancy combo but I'll used reflective light for hi light and seperate the dark and the light areas and that would give the feel of roundness and dimensions.

I hope you like them.  And here are my project that I used blue and brown with abit of green on my mouse from Harvest Wishes stamp.

Here is my project
Showcasing Harvest Wishes stamp and Lantern dies.


And since today is 1st day of October, I also would like to invite you all to join us for our new October Mood Board Challenge.  And here is our Mood Board photo inspiration.


Click here to join us at CDD Facebook Gallery.

Here is my favorite color combo : Blue, Green and Brown


Some of you might know that I love to color nature and create my nature scene so those are colors that I often reached out for.  Well there is orange but I can't color it green or blue right :) I wanted my pumpkins to be deep rich orange to match my October Mood Board photo inspiration.


I decided to created this shaker card using our Lantern dies as my shaker window and filled in with those pretty Maple Leaves sequin.

Here is how I made it


I cut the Lantern die out of brown card stock several times and one of them I attached vellum instead of acetate sheet for the softer look.  On watercolor paper I played with my peerless watercolor and chose the color that closed to the mood board photo.  I also colored the papa mouse from Harvest Wishes and fussy cut him out


I then stacked all the lantern cut pieces altogether and put one with the vellum on top.  I decided to add in the candle die that also from Lantern die.  For the background panel I cut it with Crazy Stitched Frame dies. I temperary put all pieces together and I felt it much needed for something on top of the lantern so I took the pretty bow dies from Shaker Tag dies and cut it from red card stock.  For the sentiment I used Flag Banner dies.

And here how it look after I put all pices together.


I also added in the pumpkins to balance out my images.  I put the papa mouse on form tape and attached the bow on top of the lantern.  I finished it off by sprinkling Maple Leaves sequin here and there and dropped Glossy Accent on the mouse glasses.

I hope you like it as much as I do and Thank you for stopping by today.  I also hope you can play along with us for our October Mood Board Challenge.
There are some prizes to be won.

Hugs,
Jan

Here are CDD products that I used

Harvest Wishes
Lantern Dies
Crazy Stitched Frames
Flag Banner 
Shaker Tag 
Maple Leaves Sequin
Glossy Accent

Wednesday, September 20, 2017

Never Ending Card - Halloween Theme!

Hello everyone...  Super Happy to share with you my never ending card.  I had a couple of requests asking for tutorial...  :)

Managed to make YouTube vdo showing how I did it and here it is


And I also have some photo for you here as well..


I used Craftin Desert Divas Halloween Scene Stencil for this front cover.


Opened up 2nd page I used Frightfully Sweet stamp for the flying witch, the moon, the bats, pumpkin and troll cat.  The zombie creeping out are from Zombody stamp.  I also used Garden Border dies for my zombie to creep out.


Here is the 3rd panel I used Boo Crew planner stamp for all the 4 corners.


And here is my last panel using the adorable dracula and the cauldron are from Frightfully Sweet stamp.

I hope you like it and Thank you for stopping and Have a Wonderful day.

Hugs,
Jan

(Links are affiliate links which mean I'll earn some extra from CDD at NO EXTRA cost to you if you purchase CDD products from these links.... Thank you for you support)

Here are CDD products that I used
Halloween Scene
Frightfully Sweet
Zombody
Boo Crew
Garden Border


Sunday, September 17, 2017

Thanks From All Of Us

Hello everyone!

Im excited to be back on Craftin Desert Divas' Blog today sharing with you my project and I'd like to take this opportunity to invite you all to join us for our September Mood Board Challenge.

Here is what I made for you


and here is our September Mood Board Inspiration Photo


Click here to join us at CDD Facebook Gallery

When I saw this mood board photo inspiration I immediately thinking of flowers and orange and gold.  That's what I decided to do with this card.


Flowers In Boom stamp is one of my all time favorite stamp from CDD.  I kept coming back to color different flowers that this set has to offer.

I began by cut my watercolor paper panel from Picture Frame dies and started arranged my orchid stamp images at the bottom right of my main panels. I heat embossed with gold embossing powder and I did masking all the flowers when they overlapping each other.


I colored them with my peerless watercolors and I love how vibrant they are.   I wanted to put the word die cut "Thanks" from Gretting Word dies and decided to cut it from the piece of paper that I heat embossed with the same gold embossing powder.  I also used the sentiment "from all of us" from Tiny Sentiment stamp and heat embossed it with gold embossing powder as well.

Before I attached the sentiments on I did some splatters of colors for some interests.

I hope you like it and hope you can join us for some fun and prizes.

Thank you for stopping by.  Have a wonderful day.

Hugs,
Jan

(Links are affiliate links which mean I'll earn some extra from CDD at NO EXTRA cost to you if you purchase CDD products from these links.... Thank you for you support)

Here are CDD products that I used.
Flowers In Bloom
Tiny Sentiments
Picture Frame
Greeting Word