Hello everyone
Welcome back :) I'm on Craftin Desert Divas blog today and I have some fun techniques to share with you using stencil for Dry and Heat Embossing.
Here are some great ways to use stencil that you have and create a soft and textured background with Dry and Heat Embossing Techniques. In this card, I created both dry and heat embossing techniques with Heart Galore stencil.
First I cut my panel with Inside Scalloped Rectangle dies. Using the inner frame, I positioned and secured my card base to the stencil with some washi tapes.
Tip : attach the washi tape behind the card stock so that the front panel will be fully embossed.
Here is my sandwich for big short machine. Multipurpose platform on TAB 1 + 1 clear cutting plate + my stencil with card stock + tan embossing mat + 1 clear cutting plate.
Tip : Depending on each cutting machine, you might need to put extra card stock for more pressure. You need to follow your machine's manufacture instruction for embossing sandwich.
Here's what mine look like.
I wanted to highlight some hearts on my panel so I decided to do heat embossing on certain hearts by putting back the stencil on the same position as before and masking the surrounding area with some post-it tape. I then applied VersaMark ink onto the open area.
Tip : Do not twist the ink pad. Just pressed it firmly up and down. This is because it might move the stencil and the impression will not be the same position as the dry embossed area.
I removed the stencil carefully and poured gold embossing powder over the inked area.
Tip : Always use anti static power tool before inking. Use paint brush to remove unwanted powder and if there is small area use Quick Pick tool or Pick Me Up tool to pick it away. Preheat your heat gun to minimize uneven card stock from the heat.
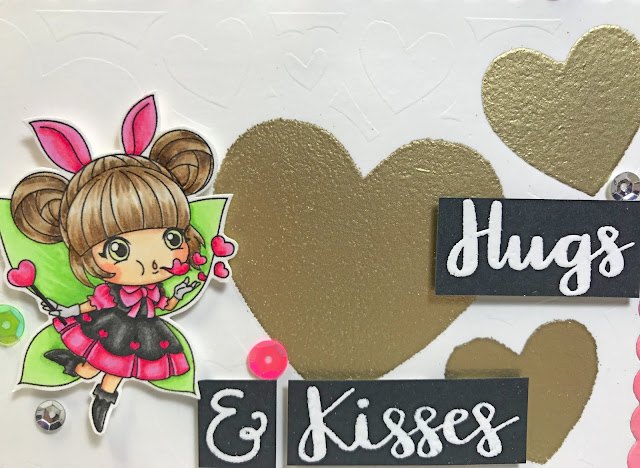
I attached the panel back to its frame and began coloring this little cutie fairy from Holiday Fairy stamp with copic markers as well as white heat embossed the sentiment from Sending Sentiment stamp.
And here is a close up look once it's done. I also sprinkled some sequins here and there for little finishing touch. I do hope you like it and give these techniques a try.
Thank you.
Hugs,
Jan
(Links are affiliate links which mean I'll earn some extra from
CDD at NO EXTRA cost to you if you purchase CDD products from these
links.... Thank you for your support)


ReplyDeleteit is really helpful. the information in this article is satisfied me. And the information it is very interesting. Thanks for this kind of article.
visit our website
Hey! This is my first visit to your blog.
ReplyDeleteWe are a collection of volunteers starting with one
a new project in the community in the same niche.
Your blog has provided us with useful information to work with. YOU
did a fantastic job!
sure kaspersky system checker crack
windows 7 professional crack
save2pc crack
I am always left astounded at the level of dedication and hard work you put in every situation. May you reach every height of success!
ReplyDeletedefraggler crack key
wondershare uniconverter crack
earthview crack
Great work on the recent project. Your brilliant problem-solving skills helped us to reach our targets much more quickly.
ReplyDeleteblufftitler ultimate crack
chrispc screen recorder pro crack
photosweeper crack
You are so interesting! I don't think I've read anything like this before. It's great to find someone with real ideas on this topic. Indeed ... thank you very much for starting. This site is something needed on the internet, not real!
ReplyDeleteThis is a great blog! Your site is loading too fast!
What type of web server do you use? Can you send me an affiliate link for your web host?
avidemux crack
smartsound sonicfire pro crack
edraw max crack
nitro pro crack