Wednesday, March 30, 2016

You're The Fairy Best

Hello Friends...
Thank you for stopping by... Today I am on Craftin Desert Divas' Blog sharing with you my projcet. I am falling in love with this Magical Wishes stamp set.  It's fully packed with many pretty images like Fairy, Mermaid, Unicorn and many more.  Today I chose Fairy image to made my card..

And here it is

I used alot of masking technique in this card.  Started by stamping my mashroom then masked it off by stamping again on masking paper or post-it note and cut it out.  Then I stamped the log and masked it off and I moved on to the tree and also masked it off.  I then stamped my main image the fairy from Magical Wishes stamp set as if she's floated in the air and I also masked her off.

The fairy and the mushroom are from Magical Wishes stamp set.  The log, tree and grass border are from Build A Scene stamp set.  I then began to ink up my background using distress ink and also masking technique.  The idea was to make the scene as the light shining thru the fairy when she gives her blessing. *lol*  I used Mustard Seed for the sun light and Twisted citron, Mowed Lawn and Peeled Paint to make my forest scene..

Here is the closer look

After I've done with the background I took off all my maskings and began to color all my images with various copic markers.  I then stamped the grass border to fill up the bottom part of  my panel and also colored it with copic markers.  I then cut the panel using my Fancy Frame Dies and attached it to my black card stock to make a frame.  And adhered it to my light blue card based.

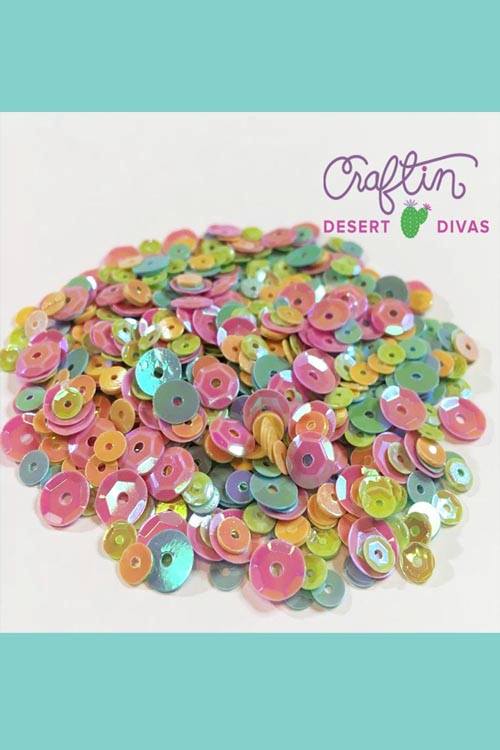
I stamped the sentiment at the top of my card. and used wink of stella on all over my fairy.  I used grossy accent on the wings and red stickles on the flowers.  To finish my card, I added alot of Pizazz Sequins.

Here is the closer look at the sentiment and sequins

I hope you like it and Thank you for stopping by today.

Here are CDD's products that I used : 

Magical Wishes


Build A Scene


Fancy Frame Dies


Pizazz Sequins


Monday, March 28, 2016

Craftin Desert Divas Linky Party Theme Black & White with A Splash of Color


Hello friends! The theme for this Linky Party at Craftin Desert Divas is "Let It Snow"! We would love to see all of your projects that fit this theme! So go ahead and craft it and link it up on the Craftin Desert Diva's Blog.

Every other Monday will mark the beginning of a new semi-weekly Linky Party over 
at the CDD blog. We hope you will share your projects with us! And don't forget 
about  the prizes! Every Linky Party will have a winner and a Top 3! 
The more times you link up...the more chances you have to win!!

Our Sponsors for this Linky Party are:

One 4"x 6" stamp set
One Digi Stamp of choice

$25 Gift Card (Regular Priced Items)


Here is what I made..
I giggled alot when I had the idea of doing this card.  I first stamped the Cow from Farm Living stamp set in the middle of my white card panel.  I then made a mask by stamping again at masking paper or post-it note and fussy cut it out.  I then placed my masking and began to stamp the cow on the left and right with light gray ink.  I used stamp positioning to restamp both cows (left and right) to make it abit darker.  I then moved my masking to 2nd cow on the left and stamped the cow again toward the left hand side.  I repeated the same process on the right hand side cow.

After the masking was done, I began to color them with various copic markers.  I used Warm gray01, W03 and W05 on the most left and most right cows. Warm gray03, W05 and W07 were on the left and right cows of my center cow.  For my main center cow I used R22, R24 and R29.

Closeup look (great dimension for 1 layer card)

 I stamped the sentiment "Cawabunga!" also from Farm Living stamp set at the center above my image and used red color pencil to hi light and matching my red color on the cow.  I then cut my panel with Fancy Frame Dies and layer it on black card stock then to my card base.  To finish it off, I used Lily White Sprinkles I colored some in red and black and sprinkled all over my card.  And it's done!

 Here is the closer look of the sentiment and Sprinkles

Thank you for stopping by and I wish you a Wonderful Day!


Here are all the CDD products I used:

Farm Living

Fancy Frame Dies

Lily White Sprinkles


Wednesday, March 16, 2016

Easter Greetings

Hello My Crafty Friends...

Today I am on Craftin Desert Divas' Blog sharing with you my projcet - One Layer Card, I made with the adorable stamp sets Bunny Trial and Build A Scene.

And here is my card..


How stinkin cute is that! The chick with rabbit ears' hat in the egg car... Love Love Love it.

I began by stamping the adorable driving chicken from Bunny Trail stamp set on the white card stock as well as on masking paper or post-it note.  I then masked off the image and started building my background scene.  This Build A Scene stamp set is at MUST to have.  It's so versatile to build any background scenes.  In this card I used the wooden fence, the pebble rock path, the grassy border and the smaller grass images.  After done that fun stamping, I started coloring all the images with various copic markers and used tumble glass distress ink to ink up my sky.

Closeup look at my cutie bunny chicken

I then stamped the greeting and also used True Love sequins to decorate my fences as well as Pastel Paradise sequins to accent my card.


Here are the sentiment and the sequins closeup


To finish up my card I used Fancy Frame Dies (big scallop) and cut it out from white card stock. I then adhered my main panel onto the frame then to my card base.  And it's done!


Thank you for stopping by & I wish you all a wonderful day!


Here are CDD's products I used 

Bunny Trail


Build A Scene


Fancy Frame Dies


Pastel Paradise Sequins


True Love Sequins


Monday, March 14, 2016

Craftin Desert Divas Linky Party Theme - Color/Photo Inspiration


Hello friends! The theme for this Linky Party at Craftin Desert Divas is "Color/Photo Inspiration"! We would love to see all of your projects that fit this theme! So go ahead and craft it and link it up on the Craftin Desert Diva's Blog.

Every other Monday will mark the beginning of a new semi-weekly Linky Party over 
at the CDD blog. We hope you will share your projects with us! And don't forget 
about  the prizes! Every Linky Party will have a winner and a Top 3! 
The more times you link up...the more chances you have to win!!

Our Sponsors for this Linky Party are:

One 4"x 6" stamp set
One Digi Stamp of choice

$25 Gift Card (Regular Priced Items)

Here is  card # 1 that I created ....
Look at this adorable multicolor chick!
Don't you love her.. *lol*

I have to admit that I did practiced this technique quite abit before I achieved the look I like.  The images that I used is from Bunny Trail stamp set.  I used Distress inks as watercolor medium for the eggs and the background.  The distress inks that I used were Mustard Seed, Milled Lavender, Seedless Preserves, Barn Door and Cracked Pistacio.  For the chicken image, I used similar colors with copic markers.

On the watercolor paper, I first wet the area that I wanted to put the ink on.  I then dropped the respective color onto it.  I put more water on that wet area to make it a pool of color water.  Then I used straw to blow the ink toward the center of the card.  I kept on adding ink and water until I got the color that I wanted.  I did all 5 colors in the same manner and I used the heat tools to dry each color in between.

I then stamped the eggs image multiple times on watercolor paper and colored them with distress inks as well then fussy cut them out.  For the chicken, I stamped the image on white card stock and colored her with various copic markers then fussy cut her out too. 
Here is how it look closed up
After the colored puddles dried, I used Fancy Frame Dies to cut it out.  I then arranged the eggs on top of the each colors, some were directly to the panel and some were on form tape.  I also stamped the sentiment toward the bottom of the card and adhered the chicken image above the sentiment.  I had to make it extra special by adding stickles on top of the chicken's egg shell and finished it of with Pastel Paradise sequins.

 Here is the closed up for the sentiment and sequins

And my card # 2 and #3
 I used the same distress inks pallet that I used from my card #1 (Mustard Seed, Milled Lavender, Seedless Preserves, Barn Door and Cracked Pistacio).  I started by stamping my piggy image from Farm Living Stamp Set 2 times onto white card stock.  I then colored them with various copic markers and fussy cut them out.  I used watercolor papers for both of my panels.
First one at the bottom right I used paint brush to do washing on the paper with water and then drop the distress inks at each areas.
Second card I mixed distress inks with water and used ink smooching technique with acetate sheet to transfer each inks onto the paper.  I then allowed both panels to dry.  I mixed all 5 colors together to get my brown and colored the ground for my piggies to stand.

Here are the coloser look for each card
This card I used Fancy Frame Die to cut out the panel and then attached the pig above the ground then the whole panel attached onto the cardbase.

 This card I just cut the panel to size and attached my image then onto the card base.
I then stamped the sentiment on to both cards and decorated them with Pastel Paradise Sequins.

Here is the closer look for the sentiment and sequins
 

I hope you like them and Thank you for stopping by.  I wish you all a wonderful day!

Here are all the CDD products I used :
Farm Living
Fancy Frame Dies


Saturday, March 5, 2016

Craftin Desert Divas' March Stamp Release Blog Hop Day 1 - Saturday 05 March

Welcome to the CDD March Stamp Release Blog Hop. 
All stamps are in the CDD Shop and now available for purchase HERE.


Here's what I've created for you...

Magical Wishes

I created this card with the vision in mind that the Unicorn is luminary in the dark sky.  I first stamped the unicorn with various watercolor markers on watercolor paper using markers stamping technique.  
I then used paint brush with little of water to pull in the colors from the stamp lines toward inside of the image.  Once the image was dried I masked it with post-it note and began to distress my night sky but left the surrounding of the image white.  I then used light blue distress ink to distress around the masked image started from inside the image toward out the sky.


Here is upclose look for the unicorn...


I heat embossed the sentiment and the twirly stars tails with white embossing powder.  I then used white gel pen to create the dots as stars in the sky and decorated some of the stars using CDD brand new sequins Fairy DustsI then attached the whole panel to my card base and 
My 1st card was done!


Here is a closeup for the sentiment, twirly stars tail 
& Fairy Dust sequins

2nd card : Mini Stamps
Toad you, Chameleon, Flew by and Spots

I had so much fun creating this mini polaroid type of card showcasing all 4 mini stamps for this release.
I started by stamping all 4 images on white card stock and colored them with various copic markers.  I then cut 4 pieces of black card stock to size of 2" x 2.5"Then cut the inside to make a window left about 1/8" at all 3 sides and 1/2" at the bottomI then cut my images to fit each of the polaroid frames.  Before I attached them together I did abit of inking around the edges.  I also stamped the sentiment from the previous release Kitchen Cuties stamp set to one of the polariod picture.  

To create my background panel, I used Log image from our new release stamp set Build A Scene.  I stamped the log repeatedly around the edges, colored them with brown copic markers and green markers around them.  I then arranged all my 4 polaroid pictures on top of my background panel and attached them to my black card base.  

To finish up the card I used our brand new CDD sequins Pastel Paradise to accent my card.

Here are closer look : Toad you and Chameleon

: Flew by and Spots
I hope you like the cards I created.

Here are the specials for this release:

**NEW SEQUIN MIXES will be on SALE starting at $1.00 !!

**FREE SHIPPING with minimum on orders placed!!

Shipping minimum order $10 in the USA use Code 10SHIP 
and $15 minimum every where else use Code 15SHIP

Enjoy this special for in stock items only thru 3/13 at 10pm MST
All Stamps and Dies are made in the USA.

**We will be giving away $50 DIVA DOLLARS to one lucky winner to spend in the CDD shop. 
All you have to do is join us for our 2 day hop and leave a comment on each project. The more you comment the more chances you have to win!! Winner will be announced on Monday.

We hope you have enjoyed this release and will join us again tomorrow for more design team inspiration.