Showing posts with label Craftin Desert Divas. Show all posts

Sunday, October 28, 2018

Coloring For Non-Colorers | Designer Creative Challenge

Hi... and Welcome back :)

I'm so happy to be back on Craftin Desert Divas' blog today.  For this week creative challenge, we have a fun theme : Coloring for Non-colorers for you.


I understand that not everyone enjoy coloring especially when you're just started crafting.  When you see those adorable images and you want to create cards but frustrated or no confident in coloring.  I created a short vdo sharing how you can make use of those images that you like and create a card or more without any coloring.


Here are so still photos for you


I stamped, inked the images with walnut stain distress ink and fussy cut them out.


Adding Nuvo Drops, Stickles or Liquid Pearls will make the images look more dimensional.


Using Stencils with distress inks or oxides inks for background.


Adding die cuts or small details with gel pen or glaze pen will create the life on the images and make your project looks more interesting.

I hope you enjoy my vdo and challenge yourself if you're one who enjoy coloring to create project without any coloring.  And those that coloring is not your cup of tea, please don't give up and give these techniques a try.  It's much easier than coloring I would say.

Thank you for stopping by and I wish you all a wonderful day and happy crafting.

Cheers,
Jan

Here are CDD products that I used in this card

Christmas Time stamp
Merry Florals stamp
Crazy Stitched Frame dies
Outdoor Landscape 2 dies
Hill Scene 2 stencil
Distress Oxide Inks
Nuvo Drops

(Links are affiliate links which mean I'll earn some extra from CDD at NO EXTRA cost to you if you purchase CDD products from these links.... Thank you for your support)

Sunday, October 14, 2018

One-layer Wonders | Craftin Desert Divas Designer Creative Challenge

Hi there folks..  I'm so happy to be back on Craftin Desert Divas blog sharing with you how I created multiple one-layer cards using masking with masking paper/post-it paper and stencils.

I used Holiday Fairies stamp for all cards as main image.  Using both Magic Castle and Hill Scene 2 stencils to create background, hills as well as puffy clouds.  As for the frame, I love to use Torn Paper dies for decorative edges.  To make them look a bit different besides using various distress oxide inks, I also used different sentiments from Snow Day and Santa's Helpers stamps.


One-layer card can be very complex and required multiple maskings to layer objects on top of each others.  Or it can be easy and achievable for mass production.  I'm sharing with you a short vdo how I mass produced these one-layer cards.


Here are some screenshots of the processing while I created them.


Positioned both Magic Castle stencil and Hill Scene 2 stencil onto the desired area.  By secured the card panel to the surface as well as the stencils on top of the card stock will make sure that the stencils will not shifting when inking.


Flip the stencil for multiple uses as positive and negative areas.


When changing the ink color, always clean up the stencil with damp cloth or wet wipe so that the previous ink will not be transferred to your next project.

Here are all the finished 5 cards.  They're same design but different looks.  


And here are screen short for distress oxide inks and copic markers that I used in each card.


Skin : E11/50/93
Hair : E40/42/44
Wings : BG10/11/13
Sky : Distress Oxide - broken china
Hill : Distress Oxide - ice spruce

Top left - Distress Oxide : worn lipstick, Copic :  B95/97/99
Top right - Distress Oxide : carved pumpkin, Copic : BG11/45/49
Center - Distress Oxide : wilted violet, Copic : YG 21/23/17
Bottom left - Distress Oxide : cracked pistachio, Copic : RV52/23/25
Bottom right - Distress Oxide : squeezed lemonade, Copic : R24/37/59

One-layer card is my favorite card technique.  I love fussy cut paper and do masking.  I hope you enjoy the vdo and give it a try and who knows... you might love it too!

Thank you for stopping by and have an awesome day.

Cheers,
Jan


Here are CDD products that I used in these cards

Holidays Fairies stamp
Snow Day stamp
Santa's Helpers stamp
Torn Paper dies
Magic Castle stencil
Hill Scene 2 stencil
Distress Oxide Inks

Thursday, August 23, 2018

You Whaled It! Obsessed With Distress Oxides Creative Challenge


Hello there crafty friends.... And Welcome to Craftin Desert Divas Creative Challenge : Obsessed With Distress Oxides.

http://www.craftindesertdivasblog.com/2018/08/learn-how-to-use-distress-oxides-inks.html

This week long we're playing around with distress oxides inks.  I was inspired by Sandy Allnock recent YouTube vdo about underwater scene with Alcohol Ink Refill.  So I thought that it will work as well with Distress Oxides inks.


I began by wetting the whole panel of watercolor paper and dropped the distress oxide inks in random areas.  I used shaded lilac, cracked pistachio and broken china.  With the help of paint brush I dropped more water in concentrated color areas, taped the panel against my working surface and let it dip downward.

Tips :  Do one color at a time and let it dried in between.


I tried to imitate the coral leaves by created the puddle of colored water and blow it upward with my month or you can use straw to create the random spikes.

Tips : If you choose the colors that compliment each others (opposite in color wheel like purple and yellow) you need to dry each layer of color before you add the new color otherwise it will mixed together and turned brown.


While waiting for my background panel to dry, I stamped the adorable whales from  Ocean Friends stamp and colored them with copic markers and fussy cut them out.


Once it dried I cut my main panel with Torn Paper dies and stamped the sentiment as well as the whales image directly onto my panel to get the whales' spouts and accent them with Nuvo Crystal Drops Caribbean Ocean.

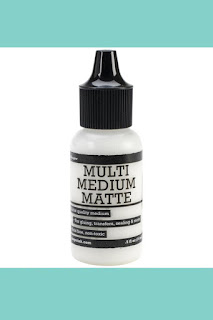
 I then attached the colored image onto the panel with Multi Medium Matte and the whole panel onto black card stock.  I also accent the edges with white gel pen.


I hope you like it and have fun with this technique.  Thank you for stopping by.

Hugs,
Jan


(Links below are affiliate links which mean I'll earn some extra from CDD at NO EXTRA cost to you if you purchase CDD products from these links.... Thank you for your support)

Here are CDD products that I used in this card
http://craftindesertdivas.com/ocean-friends/?aff=7

http://craftindesertdivas.com/torn-paper-dies/?aff=7


http://craftindesertdivas.com/nuvo-crystal-drops-caribbean-ocean/?aff=7

http://craftindesertdivas.com/white-gelly-roll-medium-point-pen/?aff=7

http://craftindesertdivas.com/multi-medium-matte-5oz/?aff=7


Thursday, August 9, 2018

Does This TuTu make My Butt Look Big? Smiles Across The Miles Creative Challenge


Hello everyone... 

Checking in today a super easy clean and simple card for Craftin Desert Divas Smiles Across The Miles Creative Challenge.

http://www.craftindesertdivasblog.com/2018/08/smiles-across-miles-best-tips-encouraging-cards.html


I love to send handmade cards because they're labor of love and care... They're perfectly imperfect and not like machine made. I often did a set of handmade cards for ones that I love to send to their love ones and spread the kindness and bring someone smiles on their faces.  I treasure all handmade cards I received and I've special box for housing them. Like I said they're labor of love 


 I have soft spot for pig...LOL  and I think this adorable little piggie from Twinkle Toes is just so darling and together with the sentiment it makes me smiles and I hope you are too.

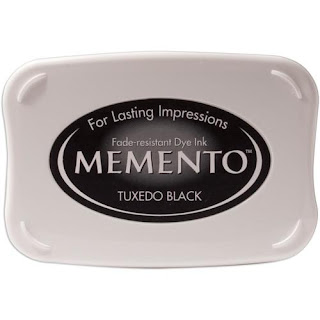
I began by cutting my main panel with Inside Scalloped Rectangle dies and worked on the inner panel by stamping the image toward to center top with Memento Tuxedo Black ink.


I colored her with copic markers.
Skin : R00 R02
Outfits : BG11 BG13 BG18


Inside Scalloped Rectangle dies also have this small bow die as you seen on my card.  I cut it on vellum and colored behind the vellum with BG18.  I also cut thin strip of vellum and wrapped around the inner part of the card front.

To finish it up, I sprinkle Lollipop Sequins here and there.  And it's done.


I hope this card can bring you a smile and Thank you for stopping by today.

Hugs
Jan

(Links below are affiliate links which mean I'll earn some extra from CDD at NO EXTRA cost to you if you purchase CDD products from these links.... Thank you for your support)

Here are CDD products that I used in this card

http://craftindesertdivas.com/twinkle-toes/?aff=7


http://craftindesertdivas.com/inside-scalloped-rectangle-dies/?aff=7

http://craftindesertdivas.com/memento-dye-ink-pad-tuxedo-black/?aff=7

http://craftindesertdivas.com/lollipop-sequins/?aff=7


Saturday, July 14, 2018

Craftin Desert Divas July Release Blog Hop

http://www.craftindesertdivasblog.com/2018/07/july-release-blog-hop.html

 
The July Release is now available for purchase!  This collection of stamps, dies (and a stencil too!) is a great addition to your Summery cards or planner spreads.  You'll find lots of creative uses for the 6x6 swirl stencil - like fun template for stitching!  Once you're done hopping, head over to the Craftin Desert Divas shop to snag your new release bundle - 10% off only through 7/15!
******

Welcome back guys!  I'm so happy to be part of Craftin Desert Divas July Release blog hop.  For the past few days, we are showcasing our July Sneak Peek Release, I'd like to round up my projects and share my thoughts about them with you....
(Scroll down for the list of the blog hop at the bottom)

Let's get started!

Day 1 : Brighter Days stamp (4x6) and Torn Paper dies.


I love the sentiments and the cheerful images from this Brighter Days stamp.  Great for encouragement cards as well as any occasions cards.  Torn Paper dies is my new favorite dies.  I love the uniqueness of it and I think distressing it with walnut stain or any brown inks will give great vintage look.


Day 2 : Skatin By stamp (4x6) and Swirl stencil 

 
Stencil is a great way to create backgrounds and there are many ways that you can play around with it.  Even tracing it and fill in with whatever medium that you like.  I traced the stencil and watercolored it with watercolor markers.  The fun and active images from this Skatin By stamp are super duper cute and I think it's perfect for everyone.  


Day 3 : Fruity Friends stamp and Llama Party stamp (4x6)


How adorable this cutie from Fruity Friends stamp is :)  Love those characters in fruity costumes and they're just perfect to create any card to cheer someone up or just even to say HELLO!

For Llama Party stamp set, I'm so sorry I didn't have a card to share with you but I'm sure our design team member friends did amazing jobs showcasing it.


Day 4 : YOU stamp (5x7)


I love playing with geometric shapes.  Even though this set has beautiful and large image covered nicely on front panel but not to overlook at the small images that are included in this set to customize your own designs.  And that big bold YOU is Awesome!


Day 5 : Good Times stamp (4x6)


Another awesome set of stamp - Good Times!  I love that you can create any occasions cards as well as to friend(s) who love reading.  Great sentiments and fonts.


So what do you think about this release?  Love them? Would love to know your thoughts.

I hope you enjoy my presentation and continue hopping along with us.
And your next stop is my sweet and talented friend  : Saundra

 Here are the full hop line up for you. 


Jan (You are here)

Thank you for stopping by today.  Happy Hopping!

Hugs,
Jan 
http://craftindesertdivas.com/new-release/?aff=7

(Links are affiliate links which mean I'll earn some extra from CDD at NO EXTRA cost to you if you purchase CDD products from these links... Thank you for your support)