Sunday, October 29, 2017

A Note Of Thanks - Die Cutting Technique

Hello everyone!
Im so glad to be on Craftin Desert Divas' blog sharing my project with you featuring our this week topic "Die Cutting Techniques".  I also combined my card for our October Mood Board Challenge.  Few more days left to enter the challenge at our CDD Facebook Gallery.  Hope you're playing along with us because we do have some prizes for you to win.  Here is the link to our challenge at CDD Facebook Gallery

This is what I made for you.

October Mood Board photo inspiration.
October Mood Board Challenge

And here is the closer look at my card

I love Inlay die cutting technique because I love doing one layer card.  I was debating between doing the water splatter on the background or leave it as it is but I think either way it will look nice and I wanted to capture the beautiful colors from the mood board photo.

Here is how I prepared my card using Inlay die cutting technique.

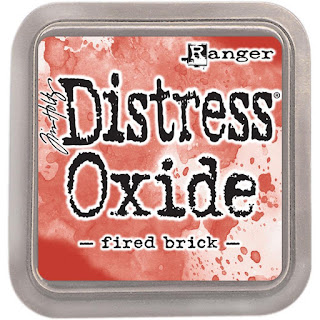
From white cardstock, I started by did my inking background using Distress Oxide wild honey and fired brick for the sky and peeled paint for the hill.
I then used a smaller Urn die and branch die from Urn dies to cut out on the positions that I planed.  After I cut those I also used the hill die from Outdoor Landscape dies to cut the hill.

On a sperate white card stock, I cut the same Urn die and colored it with copic markers.  For the branch I cut it out again from texture brown card stock.  For the hill I used the same piece of card stock from my main background and inked it up with peel paint distress oxide and it covered all the light yellow from wild honey ink.


Time to assembly all of the elements together.  I puzzled piece all of them together and used washi tape to attached them from the back.  I also stamped the stentiment directly on the hill panel.   I used the cutie birdie, crow and sentiment from Harvest Happiness stamp.  Fussy cut the birds and glued them directly to my card front.

I then attached it to thin typing paper and cut my panel using Crazy Stitched Frame dies and mounted onto black card base.  I also sprinkled Pumpkin Spice Sequins here and there and I particularly put the sea beads on the branch.

I hope you like it and joining us for the challenge.  And Thank you for stopping by today.

Hugs,
Jan

(Links are affiliate links which mean I'll earn some extra from CDD at NO EXTRA cost to you if you purchase CDD products from these links.... Thank you for you support)

Here are CDD products that I used in this card

Harvest Happiness
Urn Dies
Outdoor Landscape 
Crazy Stitched Frame
Pumpkin Spice Sequins
fired brick Oxide ink
wild honey Oxide ink
peeled paint


Sunday, October 22, 2017

Celebrate - October Mini Release CDD Sneak Peek Day 2

Welcome back my friends.. 
Im sharing today my project for Craftin Desert Divas October Mini Release Sneak Peek Day 1. 
We are showcasing a new stamp  - "Balloon Parade Stamp" with you today.

October Mini Release special: Save 10% on your order using code: mini. Offer is valid 10/22 thur 10/25, instock items only, not valid for wholesale orders or previous orders.
All new release product will be in the CDD Shop Today(10/22/17) at 3pm EST.
Click here

Here is what I made for you.


I created a box card for this fun stamp Balloon Parade stamp using Box dies.  I colored all images with copic markers and fussy cut them out.  I love those balloons and they're big balloon and so much space to colored them.  I also used Flag Banner dies for my sentiment.  Love that hand written sentiment.

Here is closer look at those images.


I decorated it with tree die from Scene Builder dies and the grass border die is from Outdoor Landscape 2 dies.  I backed up those imgaes with clear acetate for more strength.


I assembled the box using scor-tape 1/4" as well as 1/8".  I used doddlebug paper pad Hello Sunshine to decorate my panels.  I also used Fall Border dies to decorate the bottom panels of the box.

I love how it turned out and hope you like it too.  Thank you for stopping by today and I wish you all a very happy day.

Hugs,
Jan

(Links are affiliate links which mean I'll earn some extra from CDD at NO EXTRA cost to you if you purchase CDD products from these links.... Thank you for you support)

Here are other CDD products that I used

Box dies
Flag Banner
Outdoor Landscape 2
Scene Builders
Fall Border
Hello Sunshine
Scor-Tape 1/4"

Scor-Tape 1/8"

Saturday, October 21, 2017

Winter Wishes - October Mini Release CDD Sneak Peek Day 1

Hi there folks.. 
Im so happy to share with you my card for Craftin Desert Divas October Mini Release Sneak Peek Day 1. 
We are showcasing a new Border Die - "Holiday Border Dies" with you today.

October Mini Release special: Save 10% on your order using code: mini. Offer is valid 10/22 thur 10/25, instock items only, not valid for wholesale orders or previous orders.
All new release product will be in the CDD Shop on 10/22/17 at 3pm EST.

Here is what I made for you.


I wanted to create a look out scene from the window to see the "about" to sun rise background to showcase the tree border die as well as inside the house kinda feeling for the decorative chirstmas lights border die.  Both dies are from Holiday Border dies that we are featuring today.

Here is how I made it.


I printed out the window image from Bedroom Accessories digital stamp.  Since it's a digital stamp, I stretched out the image to cover my card front and cut the internal window grill out for see-thru the outside scene.  And of course I had to used Crazy Stitched Frame dies for my decorative edges.  I colored the curtain with copic markers.

On water color paper, I first stamped and white heat embossed the sentiment from Santa's Helper stamp.  I used distress inks in picked raspberry, seedless preserves and chipped sapphire as watercolor medium and did a wash of those colors.

I also cut the holiday tree and decorative lights borders from metalic silver thin card stock and white card stock for decorative lights border and colored those lights with copic markers, fussy cut those lights and adhere them on top of the silver paper then coted them with Glossy Accent.
 
Here is how it look closed up.


I also springled here and there with Jingle Berries sequins to finish off the card.  

Please join us at the event page for more cards insperation, some freebies and giveaways.  Click here to join us 


Thank you for stopping by today and I'll be back for tomorrow project for Day 2.

Hugs,
Jan

(Links are affiliate links which mean I'll earn some extra from CDD at NO EXTRA cost to you if you purchase CDD products from these links.... Thank you for you support)

Here are other CDD products that I used

Santa's Helpers
Bedroom Accessories
Crazy Stitched Frame
Jingle Berries sequin
Glossy Accent


Saturday, October 14, 2017

Craftin Desert Divas October Release Day 1

Hello everyone.

It's Day 1 for Craftin Desert Divas October Release.  

2 Word dies - Sending die and Wishing die

New digital stamps - Gingerbread Lane digital stamps

Stencils - Snowflake Flurries stencil

Sequins - Jingle Berries and Polar Frost

October Release special: Save 10% on your order using 
code: release. 
Offer is valid till 10/16, in-stock items only, not valid for wholesale orders or previous orders.


I have 4 projects to share with you.  Let's get started.

Project #1 : Angel Kisses stamp

I cut my main panel with Crazy Stitched Frame die after I printed out the Christmas Tree from Gingerbread Lane digital stamp.  I then stamped the sweet angel from Angel Kisses stamp as if she's putting up the star on top of the tree.  I knew it's overlapping the existing star on the digital stamp.  So I stamped her again on another white card stock, colored only the star, fussy cut and glued it on top to hide the overlapping images.


Here is closer look.  I colored all images with copic markers and inked up my clouds with my homemade cloud stencil.  I also added Glossy Accent on the tree's decorations and on the angel's wings.  To finish it off, I sprinkled Fairy Dust sequins here and there.


Project # 2 : Christmas Wishes


This card I combined it with another digital stamp called Christmas Eve digital stamp.  It's already in CDD shop.  This huge file has alot of images cover everything you need to create Christmas card.


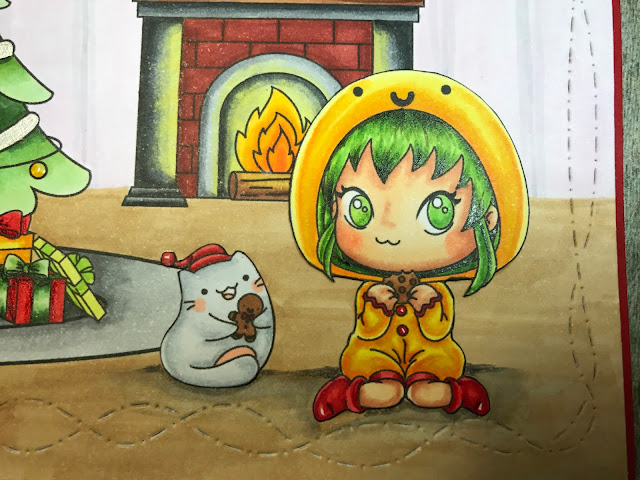
I colored all images with copic markers.  Love that little dreaming girl waiting for Christmas day and her adorable cat from Christmas Wishes stamp. 

Project #3 : Holly Jolly stamp


As this sweet girl from Holly Jolly is decorating her Christmas tree so I wanted to create the atmosphere of in the room.  I added the TV and table from Living Room Accessories digital stamp. 

I also stamped the adorable cat and hand drawn the light bulb string as if she/he is playing with them.


Here is the closer look.  I colored all images and scene with copic markers and accent them with Glossy  Accent and sprinkled Jingle Berries sequins (new) here and there.

Project #4 : Oh What Fun


I think this little girl is the cutest.  She's from Oh What Fun stamp.  I stamped her and masked her off to stencil my background with distress inks with stencil brushes.  I like the textured look that I get from stencil brushes.  I then used white pigment ink with Snowflake Flurries stencil for snowy background.


I created the snowy hill using thin typing paper to cover the bottom of my card before I created the sky background.  I colored the images and the snow slopes with copic markers and used Glossy Accent on her head band.  To finished it off, I sprinkled Polar Frost sequins (new) all over :)

I hope you like them and Thank you for stopping by today.

Hugs,
Jan

(Links are affiliate links which mean I'll earn some extra from CDD at NO EXTRA cost to you if you purchase CDD products from these links.... Thank you for you support)

 Here are CDD product that I used

October Release Products
Crazy Stitched Frame
Christmas Eve Digital 
Living Room Accessories Digital

Glossy Accent
Fairy Dust