Hi there my friends!
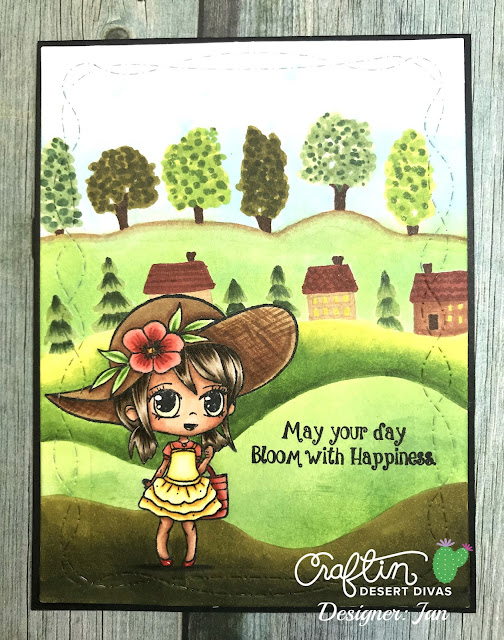
Im super happy to be back on Craftin Desert Divas blog again for the topic "Die Cutting Technique" Today I am sharing with you my project using Die Cutting as Stencil.
Here is what I made for you.
As you may know I love doing one layer card so masking techenique is a must to know. In stead of using masking paper with stamp images, we also can use die cut pieces for masking.
And here is how I prepared it.
I used all 3 dies from Fall Border dies for this card along with the sweet lady from Market Stand stamp. To make it easier you can cut those 3 dies with some post-it note or masking paper but if you don't have you also can use thin typing peper like I did and used 2 way glue pen dotted at the back of the die cute and once they're dried they'll become temporary adhesive.
I firstly stamped the girl image on my card front which was already cut with Crazy Stitched Frame die. I also stamped her on masking paper and fussy cut her out. This is because I wanted the girl to appear infront and followed by the hill then the houses and then the forest trees.
I masked both top and bottom of the hill and used distress inks in twisted citron and mowed lawn for the grass green
Here is how it look after took off the hill masks
I then began to move upward for the 2nd layer which is the houses. I also used mowed lawn distress ink for this area
This is how it look after I took off the mask paper.
Continued upward for the forest trees. I wanted the backgroud to be sky after the trees so I used tumbled glass distress ink for this area.
After took off the masking paper, this is how it looked.
I already have my cloud stencil cutting on acetate sheet from Stitched Scallop dies so it will look like puffy clouds above. And here is what it look like.
I then began to use copic markers to fill in all those gaps with various shades of green.
And this is how it look like after I colored them as well as all the background behind with copic markers.
Now what left to do was to color the girl. I usually do the backgrond first because I might make mistake and I won't wasting time colored the main image. And here is it when it's done.
Last thing I need to do was to stamp the sentiment which also from Market Stand and mounted my card panel to black card base and called it done.
Here is the closer look one more time.
I hope you like it and give this technique a try. Thank you so much for stopping by today.
Hugs,
Jan
(Links
are affiliate links which mean I'll earn some extra from CDD at NO
EXTRA cost to you if you purchase CDD products from these links....
Thank you for you support)
Here are CDD products that I used
 | |
| Market Stand |
 | |
| Fall Border |
 | |
| Stitched Scallop |
 | |
| Crazy Stitched Frame |


No comments:
Post a Comment