Sunday, November 12, 2017

Sending Hugs & Happiness - Sentiment Background

Hello there friends.
I am up on Craftin Desert Divas blog today sharing my little project focusing on this week topic "Sentiment Background".

I also would like to invite you to join us for our November Mood Board Challenge over CDD Facebook Gallery.  Come and play along with us there are prizes to be won every month.

Here is my card for you today.

And here is our November Mood Board Photo Inspiration.

Isn't the photo gorgeous?  Have to admit that this is my first time using so many of sentiment images in one card :) And here is how I prepared my card.


I used Sending Sentiments stamp,  Wishful Thoughts stamp and Tiny Sentiments stamp.  I also have 2 card fronts cut from cream and kraft card stocks with Crazy Stitched Frame dies.  I also planed to used Fancy Stitched Label dies for spotlight my sentiment panel.


I used MISTI for helping me to alight the sentiments and make sure that all small sentiments were at the same place for both of my panel.  I heat embossed with gold embossing powder base on what I feel from the photo inspiration on cream card stock and the rest I used brown inks.  I need to used darker brown on kraft card stock because when I used lighter brown color they seemed to be too soft and too blended to card stock. 

Since I wanted to spotlight my main sentiment "Sending Hugs & Happiness"  I selected the area that I wanted to spotlight and cut it with Fancy Stitched Label die.


I also colored the super adorable deer from Nice List stamp and I think the small sentiment "To My Deer Friend" is going well with the big sentiment.  So it reads "Sending Hugs & Happiness To My Deer Friend"  I colored him/her with copic markers and hand cut it out.

Here is closer look after I put all pieces together.


I filled in more small sentiments on kraft card stock and poped the spotlight sentiment panel with fun form.  I also heat embossed with gold embossing powder along the edge of spotlight panel to make it pop even more.  I attached the deer image with form tape also and finished it off by sprinkled Maple Leaves sequins here and there.

I hope you like it and Thank you for stopping by.  And don't forget to join us for the Mood Board Challenge.  Have a nice day guys.

Hugs,
Jan

(Links are affiliate links which mean I'll earn some extra from CDD at NO EXTRA cost to you if you purchase CDD products from these links.... Thank you for you support)

Here are CDD products that I used.
Sending Sentiments
Wishful Thoughts
Tiny Sentiments
Nice List
Crazy Stitched Frame
Fancy Stitched Label

Maple Leave sequin


Wednesday, November 1, 2017

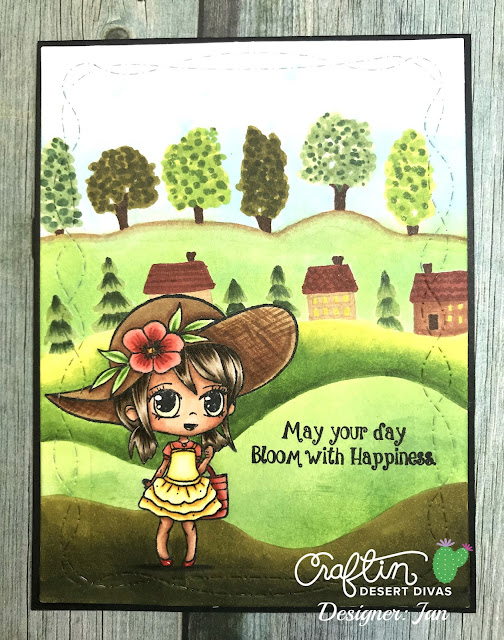
May Your Day Bloom With Happiness - Die Cutting Technique

Hi there my friends!
Im super happy to be back on Craftin Desert Divas blog again for the topic "Die Cutting Technique"  Today I am sharing with you my project using Die Cutting as Stencil.

Here is what I made for you.

As you may know I love doing one layer card so masking techenique is a must to know.  In stead of using masking paper with stamp images, we also can use die cut pieces for masking. 

And here is how I prepared it.

I used all 3 dies from Fall Border dies for this card along with the sweet lady from Market Stand stamp.  To make it easier you can cut those 3 dies with some post-it note or masking paper but if you don't have you also can use thin typing peper like I did and used 2 way glue pen dotted at the back of the die cute and once they're dried they'll become temporary adhesive.


I firstly stamped the girl image on my card front which was already cut with Crazy Stitched Frame die.  I also stamped her on masking paper and fussy cut her out.  This is because I wanted the girl to appear infront and followed by the hill then the houses and then the forest trees.

I masked both top and bottom of the hill and used distress inks in twisted citron and mowed lawn for the grass green

Here is how it look after took off the hill masks

I then began to move upward for the 2nd layer which is the houses.  I also used mowed lawn distress ink for this area


This is how it look after I took off the mask paper.

Continued upward for the forest trees.  I wanted the backgroud to be sky after the trees so I used tumbled glass distress ink for this area.


After took off the masking paper, this is how it looked.


I already have my cloud stencil cutting on acetate sheet from Stitched Scallop dies so it will look like puffy clouds above.  And here is what it look like.


I then began to use copic markers to fill in all those gaps with various shades of green.


And this is how it look like after I colored them as well as all the background behind with copic markers.


Now what left to do was to color the girl.  I usually do the backgrond first because I might make mistake and I won't wasting time colored the main image.  And here is it when it's done.


Last thing I need to do was to stamp the sentiment which also from Market Stand and mounted my card panel to black card base and called it done.

Here is the closer look one more time.

I hope you like it and give this technique a try.  Thank you so much for stopping by today.

Hugs,
Jan

(Links are affiliate links which mean I'll earn some extra from CDD at NO EXTRA cost to you if you purchase CDD products from these links.... Thank you for you support)

Here are CDD products that I used
Market Stand
Fall Border
Stitched Scallop 
Crazy Stitched Frame

Sunday, October 29, 2017

A Note Of Thanks - Die Cutting Technique

Hello everyone!
Im so glad to be on Craftin Desert Divas' blog sharing my project with you featuring our this week topic "Die Cutting Techniques".  I also combined my card for our October Mood Board Challenge.  Few more days left to enter the challenge at our CDD Facebook Gallery.  Hope you're playing along with us because we do have some prizes for you to win.  Here is the link to our challenge at CDD Facebook Gallery

This is what I made for you.

October Mood Board photo inspiration.
October Mood Board Challenge

And here is the closer look at my card

I love Inlay die cutting technique because I love doing one layer card.  I was debating between doing the water splatter on the background or leave it as it is but I think either way it will look nice and I wanted to capture the beautiful colors from the mood board photo.

Here is how I prepared my card using Inlay die cutting technique.

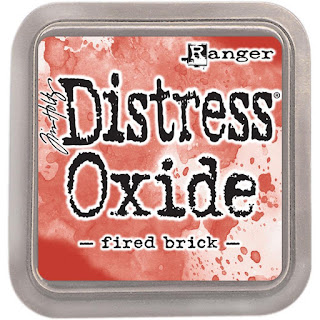
From white cardstock, I started by did my inking background using Distress Oxide wild honey and fired brick for the sky and peeled paint for the hill.
I then used a smaller Urn die and branch die from Urn dies to cut out on the positions that I planed.  After I cut those I also used the hill die from Outdoor Landscape dies to cut the hill.

On a sperate white card stock, I cut the same Urn die and colored it with copic markers.  For the branch I cut it out again from texture brown card stock.  For the hill I used the same piece of card stock from my main background and inked it up with peel paint distress oxide and it covered all the light yellow from wild honey ink.


Time to assembly all of the elements together.  I puzzled piece all of them together and used washi tape to attached them from the back.  I also stamped the stentiment directly on the hill panel.   I used the cutie birdie, crow and sentiment from Harvest Happiness stamp.  Fussy cut the birds and glued them directly to my card front.

I then attached it to thin typing paper and cut my panel using Crazy Stitched Frame dies and mounted onto black card base.  I also sprinkled Pumpkin Spice Sequins here and there and I particularly put the sea beads on the branch.

I hope you like it and joining us for the challenge.  And Thank you for stopping by today.

Hugs,
Jan

(Links are affiliate links which mean I'll earn some extra from CDD at NO EXTRA cost to you if you purchase CDD products from these links.... Thank you for you support)

Here are CDD products that I used in this card

Harvest Happiness
Urn Dies
Outdoor Landscape 
Crazy Stitched Frame
Pumpkin Spice Sequins
fired brick Oxide ink
wild honey Oxide ink
peeled paint


Sunday, October 22, 2017

Celebrate - October Mini Release CDD Sneak Peek Day 2

Welcome back my friends.. 
Im sharing today my project for Craftin Desert Divas October Mini Release Sneak Peek Day 1. 
We are showcasing a new stamp  - "Balloon Parade Stamp" with you today.

October Mini Release special: Save 10% on your order using code: mini. Offer is valid 10/22 thur 10/25, instock items only, not valid for wholesale orders or previous orders.
All new release product will be in the CDD Shop Today(10/22/17) at 3pm EST.
Click here

Here is what I made for you.


I created a box card for this fun stamp Balloon Parade stamp using Box dies.  I colored all images with copic markers and fussy cut them out.  I love those balloons and they're big balloon and so much space to colored them.  I also used Flag Banner dies for my sentiment.  Love that hand written sentiment.

Here is closer look at those images.


I decorated it with tree die from Scene Builder dies and the grass border die is from Outdoor Landscape 2 dies.  I backed up those imgaes with clear acetate for more strength.


I assembled the box using scor-tape 1/4" as well as 1/8".  I used doddlebug paper pad Hello Sunshine to decorate my panels.  I also used Fall Border dies to decorate the bottom panels of the box.

I love how it turned out and hope you like it too.  Thank you for stopping by today and I wish you all a very happy day.

Hugs,
Jan

(Links are affiliate links which mean I'll earn some extra from CDD at NO EXTRA cost to you if you purchase CDD products from these links.... Thank you for you support)

Here are other CDD products that I used

Box dies
Flag Banner
Outdoor Landscape 2
Scene Builders
Fall Border
Hello Sunshine
Scor-Tape 1/4"

Scor-Tape 1/8"